Initialization
The Brain of your robot is the Raspberry Pi. It connects everything to Remo.TV and runs all of the hardware. The first step is to set up your Pi.
Flash a MicroSD Card
Start by flashing a MicroSD card on your PC or Mac. You will need a MicroSD card reader, or an adapter and a standard SD card reader.
Download BalenaEtcher and flash an 8GB (or more) card with the latest version of Raspbian Lite.
Connect to your Raspberry Pi
If it’s your first time with a Raspberry Pi, you should connect an HDMI display and keyboard as well as power to the Pi with a quality Micro USB cable and a power supply that is providing 5 volts at at-least 2 amps. The official Raspberry Pi power supply provides 5 volts at 2.5 amps.
Attention
One of the major issues most robot builders come across is poor quality USB power packs and USB cables. Many batteries will not actually provide the power they say they are rated for. The Raspberry Pi should optimally be run at a steady 5 volts at 2.4 amps.
We will be doing things with a command line interface only. This is so that you begin to familiarize yourself with programming and navigating the brain of your robot this way. There are many ways to do this part, but learning to navigate the terminal and command line will be an important step.
You can find some commonly used commands for the Raspberry Pi here.
The Login Prompt
Once your Raspberry Pi has finished booting, the first prompt you should see is the login prompt. The default login is shown below. When you enter your password, you will not see it on screen. This is on purpose.
Username: pi
Password: raspberry
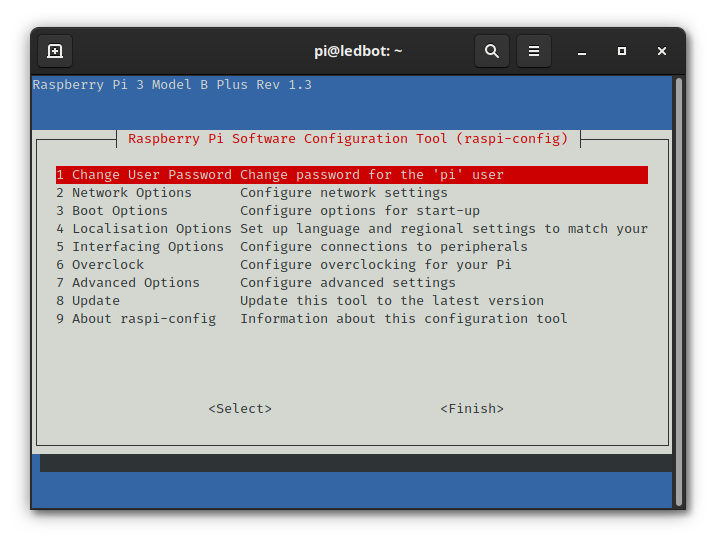
Set up your Raspberry Pi using raspi-config
- Enter
raspi-conigby entering the following at the command prompt:
pi@raspberry:~$ sudo raspi-config
If this is your first time running
raspi-config, it will ask you to set up your locale, timezone, and WiFi country as. Choose appropriate settings for your location.Change your password! This is very important as leaving the password as the default will allow anyone on the same network to gain direct access to your robot.
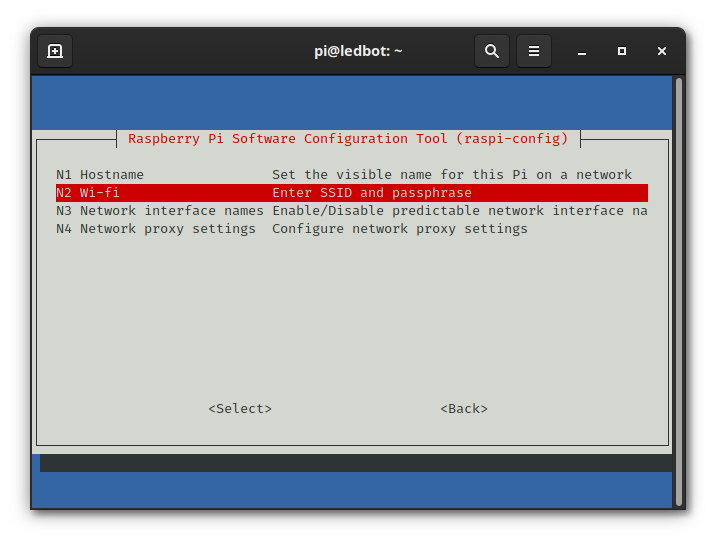
- Network options.
- Add your WiFi name and password. If your WiFi fails to connect, try these instructions.
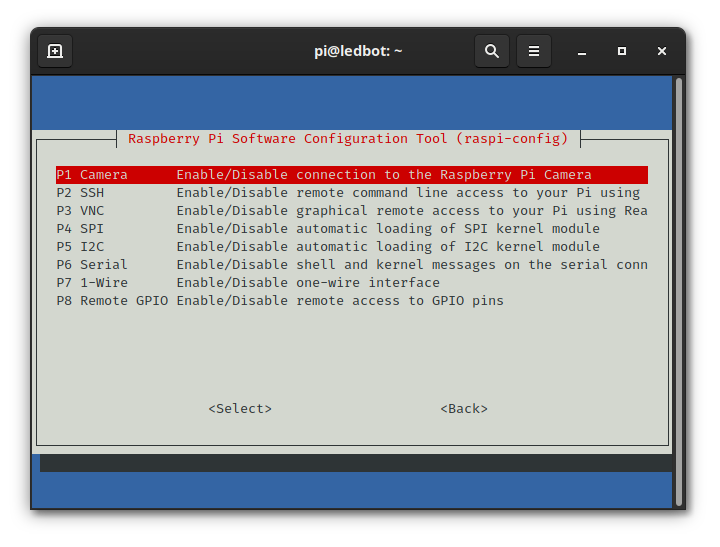
- Interfacing Options
- Enable SSH. You will want to be able to connect to your robot using your computer remotely. If fo no other reason than to copy and paste command line instructions to avoid typos.
- You may want to also enable I2C here if you plan on using the Adafruit Motor Hat or others that use I2C.
- If you plan on using the Raspberry Pi Camera module, enable that here as well.
Exit
raspi-config. Use your right arrow key to move and select<Back>, hit enter. Then do the same to select the<Finish>button.
Update Before Continuing
The operating system you installed doesn’t have the most up to date software packages. To get the ones we need, run the following:
pi@raspberry:~$ sudo apt update
pi@raspberry:~$ sudo apt upgrade -y
Reboot your Raspberry Pi
To restart your Raspberry Pi, type the following into the command prompt:
pi@raspberry:~$ sudo reboot
When you reboot to the command line, your IP address should be shown in the last few messages before the login prompt. Write it down. If you don’t see it, after logging in again, type:
pi@raspberry:~$ ifconfig
If you’re using an Ethernet cable, the address will be listed in eth0 as
inet and will look either like 192.168.XXX.XXX or 10.0.XXX.XXX If
you’re using WiFi, look for the same information under wlan0.
Connect Via SSH to your Raspberry Pi
Switch over to your computer connected to the same network as the Raspberry Pi.
- SSH into the Pi.
On MacOS SSH is built into the termainal. Just press
command+spaceand typeTerminal. Once inside, just type:you@yourComputer:~$ ssh pi@Your.Raspi.IP.AddressWindows requires a special application called PuTTY.
- After you install (and possibly reboot) just enter your Raspberry Pi’s IP adress into the input box and press ‘connect’.
Enter your login details.
username: pi
password: the new password you just set
You now have a “shell” inside your Raspberry Pi that you can copy and paste text into. We recommend copy/pasting every command listed in later instructions instead of typing them by hand.